> ## Documentation Index
> Fetch the complete documentation index at: https://base-a060aa97-eb-mini-app-ia-overhaul.mintlify.site/llms.txt
> Use this file to discover all available pages before exploring further.
# MiniKit Overview
> Easiest way to build Mini Apps on Base
MiniKit is easiest way to build Mini Apps on Base, allowing developers to easily build applications without needing to know the details of the SDK implementation. It integrates seamlessly with OnchainKit components and provides Coinbase Wallet-specific hooks.
## Why MiniKit?
MiniKit streamlines mini-app development by providing a comprehensive toolkit that makes complex Farcaster SDK interactions intuitive:
Build apps with minimal knowledge of the Farcaster SDK
Access Coinbase Wallet-specific hooks
Use [OnchainKit](https://onchainkit.xyz/) components out of the box with
MiniKit
CLI tool for quick project scaffolding with webhooks and notifications
## Use Cases
And many more possibilities!
## Quick Start
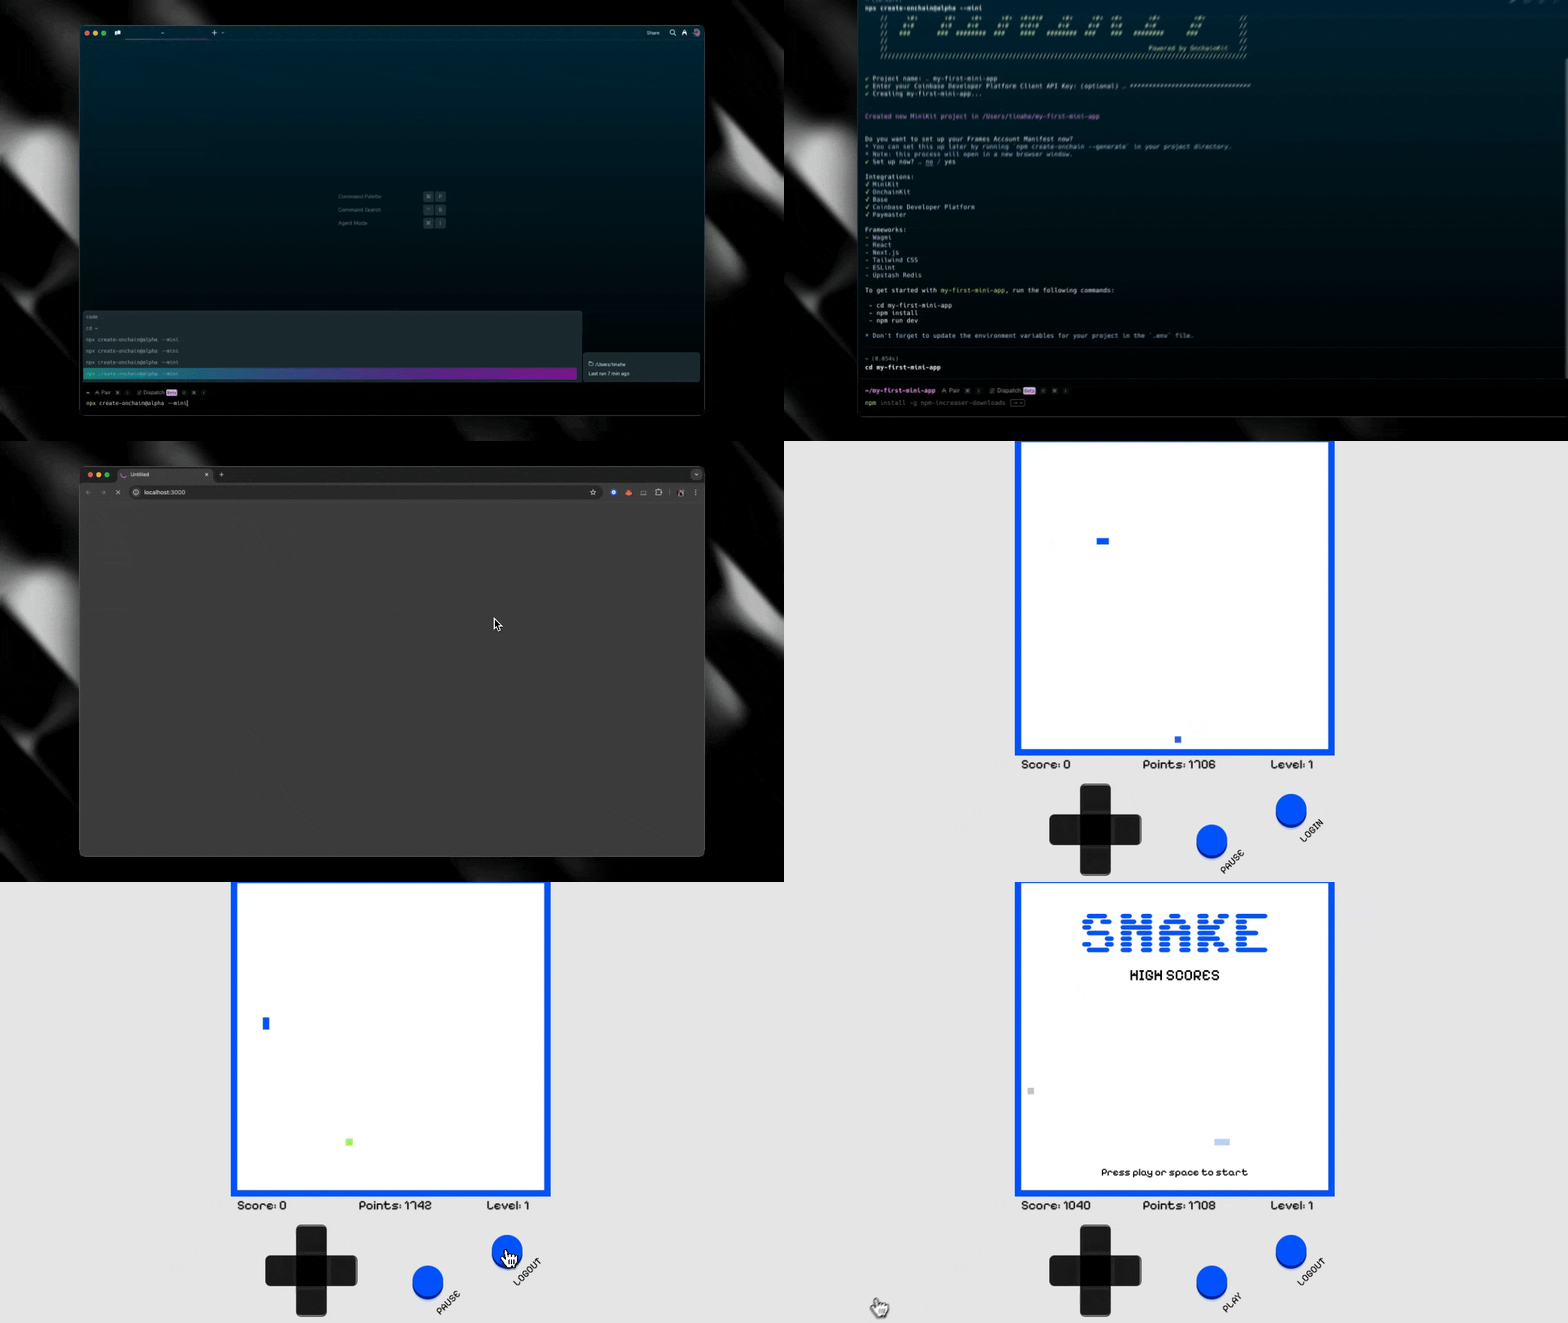
The fastest way to get started with MiniKit is to use the CLI to bootstrap a new project:
```bash
npx create-onchain --mini
```
You can also follow our comprehensive Quick Start guide for detailed setup
instructions
This command will:
Set up a new project with both frontend and backend components
Configure webhooks and notificationsSet up account association generation
Create a demo app showcasing onchain abilities using OnchainKit
After running the command, follow the prompts to configure your project.
We recommend using [Vercel](https://vercel.com) to deploy your MiniKit app, as
it integrates seamlessly with the upstash/redis backend required for webhooks,
and notifications. The CLI will guide you through setting up the necessary
environment variables for your Redis database.
## Provider
The `MiniKitProvider` wraps your application and provides global access to the SDK's context. It handles initialization, events, and automatically applies client safeAreaInsets to ensure your app doesn't overlap parent application elements.
```tsx
import { MiniKitProvider } from '@coinbase/onchainkit/minikit';
function App({ children }) {
return (
{children}
);
}
```
### Props
The `MiniKitProvider` accepts the following props:
React components to be wrapped by the provider
Optional URL to override the default `/api/notification` proxy
All props from `OnchainKitProvider` are also supported
The provider sets up wagmi and react-query providers automatically. It configures connectors to use the Farcaster connector if `sdk.context` is set, with a fallback to CoinbaseWallet. This allows the same application to run both as a Mini App and as a standalone application.
## Hooks
MiniKit provides several utility hooks that wrap the SDK functionality, making it easy to access different features.
### useMiniKit
This hook handles initialization of the application and provides access to the SDK context.
```tsx
const {
setFrameReady,
isFrameReady,
context,
updateClientContext,
notificationProxyUrl,
} = useMiniKit();
// Call setFrameReady() when your app is ready to be shown
useEffect(() => {
if (!isFrameReady) {
setFrameReady();
}
}, [isFrameReady, setFrameReady]);
```
**Returns:**
Removes splash screen and shows the application
Whether the app is ready to be shown
The current frame context
Update client context
The notification proxy URL
### useAddFrame
This hook adds a Mini App to the user's list of Mini Apps and returns notification details.
```tsx
const addFrame = useAddFrame();
// Usage
const handleAddFrame = async () => {
const result = await addFrame();
if (result) {
console.log('Frame added:', result.url, result.token);
}
};
```
**Returns:**
Function that adds frame and returns notification details
### useNotification
This hook allows sending notifications to users who have added your frame. It requires a token and URL, which are returned when a user adds your frame.
```tsx
const sendNotification = useNotification();
// Usage
const handleSendNotification = () => {
sendNotification({
title: 'New High Score!',
body: 'Congratulations on your new high score!',
});
};
```
Notifications require a backend proxy to avoid CORS restrictions. The CLI
automatically sets up this proxy at `/api/notification`, but you can override
this in the `MiniKitProvider`.
### useOpenUrl
This hook wraps `sdk.actions.openUrl` and falls back to `window.open` when outside a frame context.
```tsx
const openUrl = useOpenUrl();
// Usage
;
```
### useClose
This hook wraps the `sdk.actions.close` functionality.
```tsx
const close = useClose();
// Usage
;
```
### useComposeCast
The `useComposeCast` hook provides functionality to open the Farcaster compose interface with pre-filled content.
```tsx
import { useComposeCast } from '@coinbase/onchainkit/minikit';
export default function ComposeCastButton() {
const { composeCast } = useComposeCast();
const handleCompose = () => {
composeCast({
text: 'Just minted an awesome NFT using @coinbase OnchainKit! 🚀',
});
};
const handleComposeWithEmbed = () => {
composeCast({
text: 'Check out this amazing frame!',
embeds: ['https://your-frame-url.com'],
});
};
return (
);
}
```
**Parameters:**
* `text: string` - The text content for the cast
* `embeds?: string[]` - Optional array of URLs to embed in the cast
**Returns:**
* `composeCast: (params: ComposeCastParams) => void` - Function to open compose interface
### useViewCast
The `useViewCast` hook provides functionality to view a specific Farcaster cast by its hash.
```tsx
import { useViewCast } from '@coinbase/onchainkit/minikit';
export default function ViewCastButton() {
const { viewCast } = useViewCast();
const handleViewCast = () => {
viewCast({
hash: '0x32aed77ca61c92d253b98983f1e0fd20a8bd5745',
});
};
const handleViewAnotherCast = () => {
viewCast({
hash: '0x48f4d2c45e7b1a923d5c6f8e9a7b2c1d5e8f3a6b',
});
};
return (
);
}
```
**Parameters:**
* `hash: string` - The hash of the cast to view
**Returns:**
* `viewCast: (params: ViewCastParams) => void` - Function to view a specific cast
### usePrimaryButton
This hook accepts primary button options and a callback which will be called on click.
```tsx
usePrimaryButton({ text: 'Submit Score' }, () => {
// Handle button click
submitScore();
});
```
### useViewProfile
This hook wraps `sdk.actions.viewProfile`, accepting an FID but falling back to the client's FID.
```tsx
const viewMyProfile = useViewProfile(); // Uses client's FID
const viewUserProfile = useViewProfile(123456); // Uses specified FID
// Usage
```
### useAuthenticate
This hook allows users to sign in with Farcaster. It wraps the SDK's signIn message, adding a default nonce and verification.
```tsx
const { signIn } = useAuthenticate();
// Usage
const handleSignIn = async () => {
const result = await signIn({
domain: 'your-domain.com',
siweUri: 'https://your-domain.com/login',
});
if (result) {
// Handle successful authentication
console.log('Authenticated:', result);
}
};
```
Authentication requires additional setup utilizing an auth framework like
next/auth or manually integrating session storage and route/component
authentication.
## CLI
The MiniKit CLI is the easiest way to get started. It automatically creates a sample application that integrates different parts of the SDK and some OnchainKit components.
```bash
npx create-onchain --mini
```
### Features
The CLI creates an application with:
Complete setup for adding Mini Apps, webhooks, and notifications using upstash/redis for data storage (compatible with Vercel). Requires users to sign up for an upstash/redis account and add their key and URL to the .env file.
The CLI creates both frontend and backend components to support adding Mini Apps, webhooks, and notifications. While a frontend-only option was considered, the ability to add Mini Apps and handle notifications requires backend support. If you don't need these features, you can easily remove the database and related routes after project creation.
Automatically generates valid account associations and configures the
necessary environment variables.
Sets up the required configuration file:
```json
{
"accountAssociation": {
"header": "eyJmaWQiOjgxODAyNiwidHlwZSI6ImN1c3RvZHkiLCJrZXkiOiIweDU4YjU1MTNjMzk5OTYzMjU0MjMzMmU0ZTJlRDAyOThFQzFmRjE4MzEifQ",
"payload": "eyJkb21haW4iOiI4MGI2LTI2MDAtMWYxOC0yNGM5LTYxMDUtNS0wLTQtNzA2Lm5ncm9rLWZyZWUuYXBwIn0",
"signature": "MHhmOGQ1YzQyMmU3ZTZlMWNhMzU1ZmNmN2ZjYzFmYjMyZWRhZmEyNWU1NjJiMzlhYzE4OWNlMmM5ODU3Y2JjZWViNzlkZTk2ZjhiNTc5NzZjMDM2NzM4Y2UwYjhhOGQxZmMyZDFhYzA2NTdiZTU5N2VhZjFhZDE1ODBmMGQyYjJhODFi"
},
"frame": {
"version": "next",
"name": "MiniKit",
"iconUrl": "https://onchainkit.xyz/favicon/48x48.png?v4-19-24",
"splashImageUrl": "https://onchainkit.xyz/favicon/48x48.png?v4-19-24",
"splashBackgroundColor": "#000000",
"homeUrl": "https://your-domain.app/minikit"
}
}
```
Automatically sets up a proxy route at `/api/notification` used by the
`useNotification` hook when sending notifications.
Implements webhooks using the Farcaster key registry contract for verification. Allows applications to respond to events such as `FRAME_ADDED`.
### Demo Application
The CLI also creates a demo snake game application that showcases:
* Buttons to add the frame and connect your wallet
* High score tracking with attestations using OnchainKit's `` component
* Score display using OnchainKit's `` components to resolve ENS names
* Notifications for high scores (rate limited to one every 30 seconds)
## Next Steps
Now that you have MiniKit set up, you can:
Explore the demo application to understand how the hooks work
Customize the application to fit your needs
Deploy your application to a hosting provider like Vercel
Enjoy building!
 MiniKit is easiest way to build Mini Apps on Base, allowing developers to easily build applications without needing to know the details of the SDK implementation. It integrates seamlessly with OnchainKit components and provides Coinbase Wallet-specific hooks.
## Why MiniKit?
MiniKit streamlines mini-app development by providing a comprehensive toolkit that makes complex Farcaster SDK interactions intuitive:
MiniKit is easiest way to build Mini Apps on Base, allowing developers to easily build applications without needing to know the details of the SDK implementation. It integrates seamlessly with OnchainKit components and provides Coinbase Wallet-specific hooks.
## Why MiniKit?
MiniKit streamlines mini-app development by providing a comprehensive toolkit that makes complex Farcaster SDK interactions intuitive: